Topic List
ผมบ่นอยู่หลายวันแล้วว่า "ช่วงนี้เน็ตของ CAT CDMA + AirCard 580 ที่ผมใช้อยู่มันชักอืดลงทุกวัน สงสัยต้องทิ้ง AirCard 580 แล้วไปถอย CCU-660 แน่เลย"
สาเหตุหนึ่งที่คุยกับเพื่อนใน CAT บอกว่า ได้ปิดสัญญาณที่เสาบนยอดเขาคอหงส์ (ซึ่งเป็นเสาที่ AirCard ของผมมันรับสัญญาณอยู่ ถึงแม้จะอยู่ไกลกว่าเสาที่ใกล้บ้าน แต่สัญญาณก็ดีกว่า) เพราะมันรบกวนกับเสาอื่น ๆ
นับตั้งแต่วันนั้น ผมก็มีปัญหาเรื่องสัญญาณ และความเร็วของเน็ตทันที (อันนี้คิดเอาเองนะครับ)
หลังจากหาทางปรับโน่นนี่อยู่หลายวัน ก็ไม่มีอะไรดีขึ้น
ข้างบ้านถอย CCU-660 มาใช้ ความเร็วดาวน์โหลดตั้ง 1.5 mbps อัพโหลดได้ตั้ง 500 kbps แน่ะ เห็นแล้วอยากถอยมาใช้มั่ง
เจ้า AirCard 580 มันคงน้อยใจ เลยดลใจให้ผมลองหมุนเครื่องคอมหามุมเหมาะ ๆ ใหม่
ครั้งแรกผมหมุนเครื่องคอมไป 90 องศา ทวนเข็มนาฬากา หันตูดเครื่องคอมไปทางเสาใกล้บ้าน ผลที่ได้เหมือนเดิมหรืออาจจะแย่กว่าเดิมด้วย
ลองหมุนใหม่ หมุนเครื่องคอมไป 90 องศา ตามเข็มนาฬิกา หันหน้าเครื่องไปทางเสาใกล้บ้าน
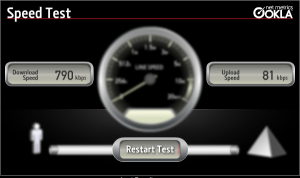
โป๊ะเช๊ะ!!!! ความเร็วเพิ่มขึ้นมาทันตาเป็นเลย พุ่งปรี๊ดขึ้นมาเป็น 400 kbps (จากเดิมแทบจะไม่เกิน 100kbps)
โอ!!!! พระเจ้าจอร์จ สุดยอดเลย.


ปล. ภาพที่เห็นเป็น speed test ตอนกลางคืน ซึ่งจะได้ความเร็วสูงกว่าตอนกลางวันมากพอสมควร


ปล.2 อันนี้เป็น speed test ตอนกลางวัน ช่วงเช้า ก็ตกลงหน่อยนึง แต่ยังรับได้
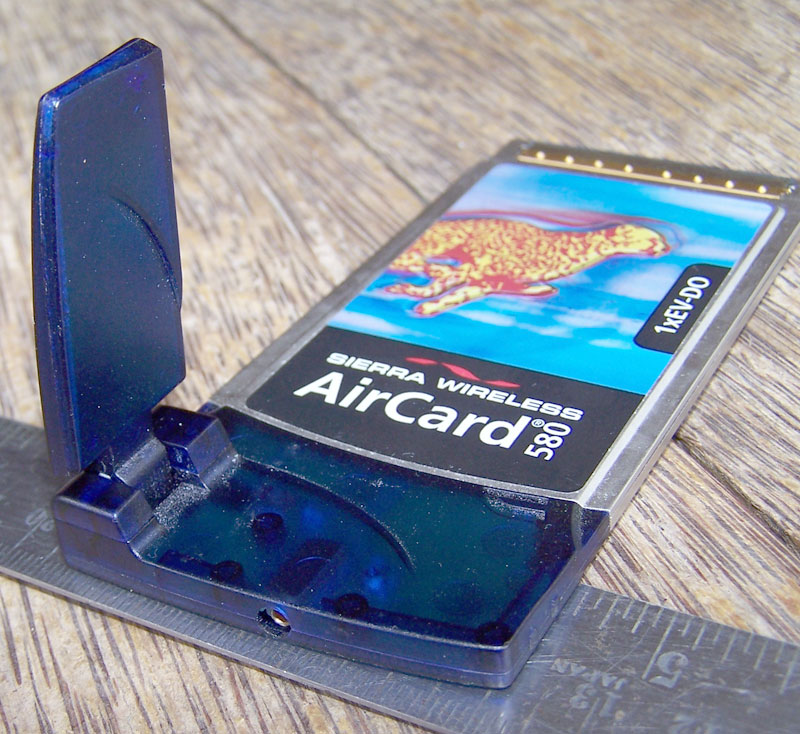
ผมใช้งาน Sierra Wireless AirCard 580 มาสัก 2 ปีได้แล้ว ช่วงแรกก็ใช้งานบน WindowsXP มาตลอด แต่ตอนนี้ได้เลิกใช้ Windows เปลี่ยนมาใช้ Ubuntu Linux เต็มตัวได้หลายเดือนแล้ว
ได้ setup Sierra Wireless AirCard 580 ให้ใช้งานเมื่อหลายเดือนที่แล้วด้วย Sprint Sierra 580 EVDO Card & Linux
เมื่อ July 08, 2008 ได้อ่านเจอบทความ AirCard Solomon SEGM 520 EDGE - Ubuntu Review เลยทดลองทำตามดู ตอนนั้นก็ทำไม่ผ่าน และได้ทิ้งไว้หลายวัน
วันนี้ได้ลองดูใหม่อีกที มีการเปลี่ยนแปลงเล็กน้อยตามขั้นตอนนี้
Hardware :
ผมติดตั้ง Sierra Wireless AirCard 580 ซึ่งเป็น PCMCIA Card โดยนำมาใช้งานบนเครื่อง Desktop จึงต้องซื้อ card PCI2PCMCIA มาเสียบเข้ากับ PCI Slot แล้วจึงนำ Sierra Wireless AirCard 580 มาเสียบอีกที
OS :
Ubuntu Hardy 8.04.1 Linux เคยติดตั้งตอน Ubuntu 7.10 ก็ใช้งานได้เหมือนกัน
วิธีการติดตั้ง มี 2 แบบ คือ
การติดตั้งแบบที่ 1 (อ้างอิงจาก http://dryicezero.blogspot.com/2005/12/sprint-sierra-580-evdo-card-linux.html)
เริ่มติดตั้ง
- เสียบ Sierra Wireless AirCard 580
- พิมพ์คำสั่ง
#sudo modprobe usbserial vendor=0x1199 product=0x0112
#sudo mknod /dev/ttyUSB3 c 188 0
- สร้างไฟล์ /etc/ppp/peers/cdma โดยให้มีข้อความดังนี้
lcp-echo-interval 0
-detach
ttyUSB3
115200
debug
noauth
defaultroute
usepeerdns
user evdo@catevdo.com
show-password
crtscts
connect '/usr/sbin/chat -v -t3 -f /etc/ppp/peers/cdma_chat'
สร้างไฟล์ /etc/ppp/peers/cdma_chat โดยให้มีข้อความดังนี้
'' 'AT'
'OK' 'ATE0V1&F&D2&C1&C2S0=0'
'OK' 'ATE0V1'
'OK' 'ATS7=60'
'OK' 'ATDT#777'
เครื่องหมาย ' ที่เห็นทั้งหมดนั้น เป็นเครื่องหมายคำพูขีดเดียวนะครับ (ผมไม่รู้ว่าอ่านว่าอะไร)
- วิธีเรียกใช้งานคือ
#sudo pppd call cdma
ผลที่ได้จะออกมาประมาณนี้
Serial connection established.
using channel 14
Using interface ppp0
Connect: ppp0 <--> /dev/ttyUSB3
sent [LCP ConfReq id=0x1 <asyncmap 0x0> <magic 0xae329712> <pcomp> <accomp>]
rcvd [LCP ConfReq id=0x0 <mru 1500> <asyncmap 0x0> <auth chap MD5> <magic 0xcde5e619> <pcomp> <accomp>]
sent [LCP ConfAck id=0x0 <mru 1500> <asyncmap 0x0> <auth chap MD5> <magic 0xcde5e619> <pcomp> <accomp>]
rcvd [LCP ConfAck id=0x1 <asyncmap 0x0> <magic 0xae329712> <pcomp> <accomp>]
rcvd [CHAP Challenge id=0x1 <21a1b50b81715df33028912ac3dc8e3d>, name = "PDSN-SNI"]
sent [CHAP Response id=0x1 <f77154c0d15d2eea846ce3a41fb2a35d>, name = "evdo@catevdo.com"]
rcvd [CHAP Success id=0x1 "Welcome to PDSN-SNI."]
CHAP authentication succeeded: Welcome to PDSN-SNI.
CHAP authentication succeeded
sent [CCP ConfReq id=0x1 <deflate 15> <deflate(old#) 15> <bsd v1 15>]
sent [IPCP ConfReq id=0x1 <compress VJ 0f 01> <addr 0.0.0.0> <ms-dns1 0.0.0.0> <ms-dns3 0.0.0.0>]
rcvd [IPCP ConfReq id=0x0 <addr 10.99.131.230>]
sent [IPCP ConfAck id=0x0 <addr 10.99.131.230>]
rcvd [LCP ProtRej id=0x1 80 fd]
Protocol-Reject for 'Compression Control Protocol' (0x80fd) received
rcvd [IPCP ConfRej id=0x1 <compress VJ 0f 01>]
sent [IPCP ConfReq id=0x2 <addr 0.0.0.0> <ms-dns1 0.0.0.0> <ms-dns3 0.0.0.0>]
rcvd [IPCP ConfNak id=0x2 <addr 10.144.31.223> <ms-dns1 61.19.64.19> <ms-dns3 61.19.245.246>]
sent [IPCP ConfReq id=0x3 <addr 10.144.31.223> <ms-dns1 61.19.64.19> <ms-dns3 61.19.245.246>]
rcvd [IPCP ConfAck id=0x3 <addr 10.144.31.223> <ms-dns1 61.19.64.19> <ms-dns3 61.19.245.246>]
Cannot determine ethernet address for proxy ARP
local  IP address 10.144.31.223
remote IP address 10.99.131.230
primary   DNS address 61.19.64.19
secondary DNS address 61.19.245.246
Script /etc/ppp/ip-up started (pid 10807)
Script /etc/ppp/ip-up finished (pid 10807), status = 0x0
Make AirCard button on panel
- Right click on panel -> Add to panel
- Select Custom Application Launcher
- Command : xterm -T "Connect to CDMA" -e sudo pppd call cdma
Thank you Ernest for your article at Sprint Sierra 580 EVDO Card & Linux
การติดตั้งแบบที่ 2 (อ้างอิงจากวิธีการของคุณ sunbackjesus)
เริ่มติดตั้ง
- เสียบ Sierra Wireless AirCard 580
เปิด Terminal พิมพ์
#sudo wvdialconf /etc/wvdial.conf
จะเป็นการค้นหา aircard และสร้าง config file ไว้ที่ /etc/wvdial.conf เมื่อค้นหาเรียบร้อยก็จะเจอ modem โดยของผมจะอยู่ที่ /dev/ttyUSB0 ซึ่งอาจจะแตกต่างกันในแต่ละเครื่อง
เข้าไปแก้ไขค่าบางอย่างโดยพิมพ์คำสั่งใน Terminal
sudo gedit /etc/wvdial.conf
ข้อความในไฟล์ wvdial.conf จะเป็นประมาณนี้
[Dialer Defaults]
Init2 = ATQ0 V1 E1 S0=0 &C1 &D2 +FCLASS=0
Modem Type = Analog Modem
; Phone = <Target Phone Number>
ISDN = 0
; Username = <Your Login Name>
Init1 = ATZ
; Password = <Your Password>
Modem = /dev/ttyUSB0
Baud = 9600
แก้ค่าบางค่าให้เป็นประมาณนี้
[Dialer Defaults]
Init1 = ATZ
Init2 = ATQ0 V1 E1 S0=0 &C1 &D2 +FCLASS=0
Modem Type = Analog Modem
Phone = <a class="hashtag" href="/tags/777">#777</a>
ISDN = 0
Modem = /dev/ttyUSB0
Baud = 9600
Username = evdo@catevdo.com
Password = cdmacat
Stupid Mode = 1
New PPPD = yes
เซฟและปิด กลับมาที่ Terminal
- Dial ด้วยคำสั่ง
#sudo wvdial
ถ้าต่อได้สำเร็จก็จะขึ้นข้อความประมาณนี้
--> WvDial: Internet dialer version 1.60 --> Cannot get information for serial port. --> Initializing modem. --> Sending: ATZ ATZ OK --> Sending: ATQ0 V1 E1 S0=0 &C1 &D2 +FCLASS=0 ATQ0 V1 E1 S0=0 &C1 &D2 +FCLASS=0 OK --> Modem initialized. --> Sending: ATDT#777 --> Waiting for carrier. ATDT#777 CONNECT --> Carrier detected. Starting PPP immediately. --> Starting pppd at Thu Aug 21 13:43:34 2008 --> Pid of pppd: 10550 --> Using interface ppp0 --> pppd: ��[06][08]
�[06][08] --&gt; pppd: ��[06][08]�[06][08] --> pppd: ��[06][08]�[06][08] --&gt; pppd: ��[06][08]�[06][08] --> pppd: ��[06][08]�[06][08] --&gt; local IP address 10.144.63.215 --&gt; pppd: ��[06][08]�[06][08] --> remote IP address 10.99.131.230 --> pppd: ��[06][08]�[06][08] --&gt; primary DNS address 61.19.64.19 --&gt; pppd: ��[06][08]�[06][08] --> secondary DNS address 61.19.245.246 --> pppd: ��[06][08]`�[06][08]Make AirCard button on panel
- Right click on panel -> Add to panel
- Select Custom Application Launcher
- Command : xterm -T "Connect to CDMA" -e sudo wvdial
ขอขอบคุณ คุณ sunbackjesus ที่ได้เขียนบทความ AirCard Solomon SEGM 520 EDGE - Ubuntu Review ทำให้ผมได้วิธีการต่อเน็ตอีกแบบ ซึ่งอาจจะทำให้ผมมีไอเดียกับ CCU-660 (หากได้ซื้อ)
เรื่องคล้าย ๆ กัน
วันนี้ลองเข้าไปค้นหาวิธีการในการ upgrade firmware ของ Sierra wireless AirCard 580 เลยไปเจอเอา FAQ ของ AirCard 580 จึงเก็บมาฝากไว้เผื่อจะได้เข้าไปค้นหาในวันหน้า
ที่มา www.sierrawireless.com
หลังจากที่ผมเริ่มทนไม่ไหวกับปัญหาการ connect ที่หลุดบ่อย (มาก ๆ แทบจะทุก 5 นาที) ในเวลาที่ใช้ AirCard Sierra 580 วันนี้ก็เลยมาหาทางแก้กันอีกที
อาการที่เป็นอยู่คือ
สัญญาณ 1x เสถียร คงที่ ต่อเนื่อง ไม่มีหลุด แต่ความเร็วเริ่มลดต่ำลงมาก ช่วงนี้ทำความเร็วได้ประมาณ 3-40 kbps เอง
สัญญาณ EVDO แทบไม่มีเลย จะมีมาเป็นช่วง ๆ สักพักก็หายไป แล้ว connection ก็หลุด ต้องคอยอีกพักใหญ่ ๆ สัญญาณจึงจะมาอีกครั้ง
ความเร็วทั้ง 1x และ EVDO ต่ำกว่าที่ควรมาก
วันนี้ได้โทรไปแจ้งปัญหาการใช้งาน CAT CDMA ที่ call center โทร. 1322 ติดต่อกับคุณธนพร
ข้อมูล : ใช้ Air Card 580 Sierra Wireless บริเวณที่ใช้งานคือ ต.คลองแห อ.หาดใหญ่
ปัญหา คือ สัญญาณ ของ EVDO จะแกว่งตั้งแต่ไม่มีสัญญาณจนถึงมีสัญญาณสูงสุดประมาณ 4 ขีด แต่ส่วนใหญ่จะไม่มีสัญญาณ มักจะเป็นในช่วงกลางวันมากกว่ากลางคืน และการ connect จะหลุดบ่อยมาก บางครั้งต่อได้แค่ 1-2 นาที ก็หลุดแล้ว
กำลังรอคอยคำตอบอยู่......
ผมเพิ่งได้ AirCard อันแรกในชีวิตมาใช้งานเมื่อสัก 2 เดือนมาแล้ว เป็นของ CAT CDMA ที่ยังไม่ได้เปิดใช้งานเป็นทางการ (เรียกว่าเส้นใหญ่ เอามาใช้ก่อน) CAT CDMA เป็นเครือข่าย 3G แห่งแรกในประเทศไทยกระมัง สามารถทำงานได้ 2 ระบบ คือ
1xCDMA ความเร็วประมาณ 100 kbps กว่า
EVDO ความเร็วตามสเปคระบุไว้ที่ 1mbps แต่ผมลองใช้งานจริงได้ประมาณ 4-500 kbps
I have received a few inquiries into my configuration of the Sierra 580 EvDO wireless card under Linux, so here is my tutorial on how to get that done. Enjoy!
I got the card working under Debian Sarge (3.1) with little modification. This method should work with all linux distributions with little or no modification. (Some of the following information was gleaned from other sites as I scanned the net for resources, so you may see bits and pieces of the following information across several sites on the net.)
Follow the steps as shown, and you should be able to connect just fine...
There is an initial assumption that the wireless card has already been activated by sprint (and probably used in windows at some point to verify that it works.)
1. Insert your wireless card and be sure that your computer recognizes it as a USB device. Look in dmesg for it. Once you have verified that it is recognized by your system, proceed to step 2.
2. Issue the following commands (you will need to sudo or su to do this)
# modprobe usbserial vendor=0x1199 product=0x0112
# mknod /dev/ttyUSB0 c 188 0
Next is the configuration of PPPD and the scripts needed.
3. Create a file named '1xevdo' with the following text, and place it in the '/etc/ppp/peers/' directory
lcp-echo-interval 0
-detach
ttyUSB0
115200
debug
noauth
defaultroute
usepeerdns
user 210xxxxxxx@sprintpcs.com
show-password
crtscts
lock
connect '/usr/sbin/chat -v -t3 -f /etc/ppp/peers/1xevdochat'
Be sure to replace '210xxxxxxx' with your wireless card's area code and 7 digit phone number.
4. Create another file, named '1xevdochat' with the text below and place in the ' /etc/ppp/peers/' directory.
'' 'AT'
'OK' 'ATE0V1&F&D2&C1&C2S0=0'
'OK' 'ATE0V1'
'OK' 'ATS7=60'
'OK' 'ATDT#777'
5. Use your text editor of choice (we all know it's vi) to add the following line to '/etc/ppp/pap-secrets'
210xxxxxxx@sprintpcs.com * zzzz
where '210xxxxxxx' is the phone number assigned to your card, and 'zzzz' is the password for your wireless card account (typically the last 4 digits of the phone number).
6. as root, issue the following command to connect to the internet
# pppd call 1xevdo
--------
That's all the instructions for the process, and hopefully it will work for you. here are some observations I have:
If you get a 'connect script failed' type of error, and you are sure that you followed the instructions, remove the wireless card and reinsert it. This is what I had to do to get my card to work properly.
The modprobe and mknod commands will need to be re issued every time you reboot. You will not need to recreate the files and scripts. You can automate the scripts for modprobe and mknod if you wish. I will post more on the automation later.
You will get two types of output when your attempt to run the script. Either you will get an error (failed connection script), or you will get a long output similar to the following:
serial connection established.
using channel 2
Using interface ppp1
Connect: ppp1 <--> /dev/ttyUSB0
sent [LCP ConfReq id=0x1 ]
rcvd [LCP ConfReq id=0x0 ]
sent [LCP ConfAck id=0x0 ]
rcvd [LCP ConfReq id=0x1 ]
sent [LCP ConfAck id=0x1 ]
sent [LCP ConfReq id=0x1 ]
rcvd [LCP ConfAck id=0x1 ]
sent [LCP EchoReq id=0x0 magic=0xeda0c264]
sent [CCP ConfReq id=0x1 ]
sent [IPCP ConfReq id=0x1 < ms-dns3 0.0.0.0>]
rcvd [LCP DiscReq id=0x2 magic=0xee74136c]
rcvd [LCP EchoRep id=0x0 magic=0xee74136c ed a0 c2 64]
rcvd [IPCP ConfReq id=0x3 ]
sent [IPCP ConfAck id=0x3 ]
rcvd [LCP ProtRej id=0x4 80 fd 01 01 00 0f 1a 04 78 00 18 04 78 00 15 03 2f]
Protocol-Reject for 'Compression Control Protocol' (0x80fd) received
rcvd [IPCP ConfRej id=0x1 ]
sent [IPCP ConfReq id=0x2 ]
rcvd [IPCP ConfNak id=0x2 ]
sent [IPCP ConfReq id=0x3 ]
rcvd [IPCP ConfAck id=0x3 ]
not replacing default route to ppp0 [10.5.250.5]
Cannot determine ethernet address for proxy ARP
local IP address xx.x.xx.xx
remote IP address xx.xx.xxx.xx
primary DNS address xx.xx.xxx.xx
secondary DNS address xx.xx.xxx.xx
Script /etc/ppp/ip-up started (pid 4273)
Script /etc/ppp/ip-up finished (pid 4273), status = 0x0
Once you are connected, by seeing the above information in your terminal window, open a web browser and try to view some pages. If your browser cannot serve pages, you may need to edit your resolve.conf file manually and add the DNS servers that you see in the above output. This should get you on the road to full connectivity in linux!
If you have any questions, feel free to e-mail me at dryicezero [a-t] gmail.com.
//Ernest
ที่มา : http://dryicezero.blogspot.com/2005/12/sprint-sierra-580-evdo-card-linux.html