ตอนนี้เริ่มมองหา Notebook ใหม่สักเครื่อง เริ่มรวบรวมข้อมูลเอามาไว้สำหรับเปรียบเทียบ
Lenovo U Series : Lenovo IdeaPad U110 - 23043BU (Black) - $1,499.00

- Up to Intel® Core™2 Duo Processor (1.6GHz)
- Genuine Windows Vista® Home Premium
- Starting at 2.4 lbs. and less than 1-inch thin
- Intel® Core™ 2 Duo L7500 processor ( 1.60GHz 800MHz 4MB )
- Genuine Windows Vista Home Premium
- Intel Graphics Media Accelerator X3100
- 3 GB PC2-5300 DDR2 SDRAM 667MHz
- 11.1 " WXGA TFT with integrated camera LCD Glossy 1366x768
- 120GB 4200
- USB Super Multi-Burner 24X Max
- +7 Cell Hybrid
- Up to 8 hours unplugged battery life
- Intel Wireless WiFi Link 4965AG
- Bluetooth Version 2.0 + EDR
ข้อสังเกตุ
- บาง เบามาก ๆ แค่ 1.1 kg
- ใช้งานนานถึง 8 ชม.
- จอเล็ก ความละเอียดสูง
ที่มา shop.lenovo.com
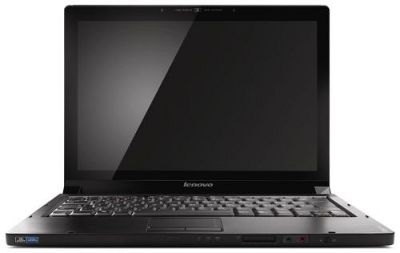
Lenovo U Series: Lenovo IdeaPad U350 laptop SU2700 ULV 13.3in 2GB 250GB DVD+-RW BT $629 shipped

Lenovo has Lenovo IdeaPad U350 laptop - 296325U w/ Core 2 Duo SU2700 ULV 1.3GHz, 13.3in HD WXGA LED 1366x768, 2GB, 250GB, DVD+-RW, 802.11b/g wireless, Bluetooth, measures 328 x 228 x 17-24.9 mm, weighs 1.6kg, comes with 5-hour 4-cell / 10-hour 8-cell battery
- 13.3 inch LED display with 1366 X 768 pixel resolution
- Different Intel Processor options like Intel Core 2 Solo SU3500 (1.4G, 800 MHz, 3 MB), Intel Pentium SU2700 (1.3G, 800 MHz, 2 MB), and Intel Celeron 723 (1.2G, 800 MHz, 1MB) processors
- Mobile Intel GS40 and GS45 Express Chipset
- Graphics: Mobile Intel GMA 4500M and Mobile Intel GMA 4500MHD Memory
- Up to 8 GB DDR3 800/1066 MHz D RAM
- Up to 500 GB harddisk(5400 rpm)
- Up to 10 hours run time with 8-cell battery and 5 hours with 4-cell battery
- Bluetooth 2.0
- 1.3 megapixel camera
- Connectivity: Ethernet 10/100/1000m/Intel WiFi Link 5150 1 X 2 AGN, Intel WiFi Link 5100 1 X 2 AGN, non-Intel wireless b/g/
- Ambient light sensor technology
- Multi-touch touchpad
- VGA ports, 4-in-1 multicard reader
- Dolby Sound Room/two 1.5 watt speakers
- HDMI output
- Vista Home Basic/Home Premium
ข้อสังเกตุ
- บาง เบา แค่ 1.6kg
- ความละเอียดจอน้อยไปนิด
- ไม่รู้ใช้ได้นานกี่ ชม.
ที่มา www.xpbargains.com , shop.lenovo.com
Lenovo IdeaPad U330 - 27,900.-

- Intel® Core™ 2 Duo Processor P7550 (2.26GHz / 1066 MHz / 3MB L2 Cache),
- 2048MB (1×2048) DDR3,
- 320GB,
- DVD SuperMulti,
- ATi 3450 256MB
- 13 WXGA LED , 13 inch WXGA+ (1440x900)
- LAN,
- Intel 5100 agn,
- BT,
- 1.3MP Camera,
- 2.0 Dolby,
- Veriface (Face Recognition Technology),
- One Key Rescue System,
- 6-in-1 card reader,
- PC-DOS,
- Battery 6 cell
- Weight 1.84 Kg.
- DOS Operating System Processor: 2GHz Intel Core 2 Duo P7350 Memory: 2GB RAM Storage: 250GB Optical Drive: DVD±RW Screen: 13.3 inches Graphics: ATI Radeon HD 3450 (256MB) Weight: 4.4 pounds Dimensions (HWD): 1.1x12.5x9.3 Operating System: Windows Vista Home Premium over five hours of life on the standard six-cell battery
ข้อสังเกตุ
- น้ำหนักไม่มากนัก (1.84 kg) (อยากได้เบากว่านี้อีก)
- ความละเอียดจอดีมาก
- DOS ไม่ต้องเสียค่า Windows เพราะยังไงก็ไม่ใช้อยู่แล้ว
- ไม่บอกเวลาใช้งาน - review บอกว่า ประมาณ 3 ชั่วโมง
- ไม่ Touch screen
- หมุนเป็น Tablet ไม่ได้
- ไม่ ULV?
ที่มา www.notebookspec.com
แถม LCD Monitor ไว้สักหน่อย